Be
able to create 3D models following industry practice
To start of the model I needed some guidance from image planes so I can make the generic shape of a human body. I then used the cube polygon to create the body, using the shortcut keys F8, F9, F10 and F11 I was able to quickly switch between object selection, vertex selection, edge selection and face selection. I changed the subdivision width and height to add in more vertices and edges so I could mould the polygon into the body shape. Selecting the vertices and moving them up down with the shortcut key "W" allowed me to mould the cube even easier. I then did the same routine with the right leg, the right foot and the right arm. I used a cube polygon, selected the vertices/edges and moulded the shape by moving/resizing the shape to fit the arm/leg. I did all of the moulding from the front perspective, when switching to the side view the polygons were all too fat, using a side view image plane helped me adjust the body parts to the correct shape and proportions.
This screenshot shows four polygons moulded into shape, the problem here is that they are all separate. What I did to combine them together was first clicked on all the pieces whilst holding shift and used the combine tool. What this did was grouped them together. The pivot tool was off centre at this point so I used the "center pivot" tool to move the pivot back to the center of the model. Then in edge mode I selected all of the edges that would not be seen if I connected the polygons altogether. These areas were the top part of the leg, the top part of the shoe and the inner shoulder. Once I had removed the edges, I then removed the vertices then was connected to the edges. The reason behind why I did this was due to making it easier when connecting the vertices together if they had the same amount of vertices in each area I was connecting to. For example, the inner shoulder could of had 6 vertices and on the body where I want to attach it to, has 4 vertices. I would need to take away 2 vertices in the inner shoulder for it to fit right. When I had finished with vertices and edges changes, I then used the target weld tool in vertex selection to weld the polygons together.
Once I had finished welding body parts together, I selected half of the body using the face selection tool and pressed delete. The reason behind this is, when I mirror the body, it will have a nice cut to the join up the pieces together. I did the same technique joining these halves together as I did combining the body parts to the body.
My next aim to focus on was creating the head for the body. I wanted the head to be quite different from a human head, considering the model is going to be a killer clown, an abnormal head would give it that creep factor. I started off with the basic cube polygon and used the same technique as before when moulding the shape of the body.
I combined the head to the rest of the body using combine and then used target weld to merge it. Then for the face features I used the face selection took, selected certain faces and then used the extrude tool to either push in the faces into the face or pulled out the faces from the face. For the nose and hair I pulled out the faces and for the eyes I pushed in the faces.
I decided that I didn't particularly like the face that I created and started the head again with another cube polygon. I moulded the shape of the head before combining and target welding it to the main body. Giving the face a bigger smile and angled eyes gave the clown a fierce yet creepy look. Furthermore, stretching the smile gave the mouth a defined, sharp look which looked really effective. The parts of clothing that you can see in the screenshot were created using the extrude tool whilst having a number of specific faces selected. For the hand, I again, extruded faces from a cube polygon and used the rotate tool to curve the extruded pieces to create curved fingers. The floating party hat above the head is made from a cone polygon which I just made smaller.
This screenshot displays the end product of what my model has turned out to be. After pressing the number 6 (which shows the shaded view with texture maps) I was able to see the result of my texture mapping. I used the planar UV mapping to create a UV snapshot for me to use in Photoshop. I then used Photoshop to design the colours and patterns of what the clown is going to wear/look like and for the party hat I decided to get rid of the cone polygon and extrude two faces on top of it's head to create it. I then used the smooth tool to get rid of the blocky nature of the shapes to create the refined, human shape. When it came to the process of the using Photoshop to create the texture for the model, I created only one UV map and then created quite a few Lambert materials separately by selecting the faces of specific areas of the model. For example, I selected the legs and parts of the top to create the texture for the dungarees. A few of the colours on the face of the clown were not done by UV mapping and creating a texture in Photoshop, it was done by selecting a few of the faces, assigning a new material and then changing the colour in Maya. This was easier for me to colour the face instead of flicking back and forth from Photoshop to Maya to find the faces which I want in a specific colour.
Evaluation:
Half way through the making process of this model, I changed the design of the head as I was not overly pleased with the outcome of it every time I smoothed out the edges. The look was not scary and that was not what I was aiming for. The neck is a little too long for a human neck so if I did remake it I would remake the neck so it wasn't so tall. Furthermore, I made the model bold as I could not agree on a great clown hairstyle that looked okay for the model, however, leaving it bold was a good option and meant that I could add a party hat with ease. On the whole, I think that the model is fabulous in it's pink shirt and blue trousers.
Feedback:
Josh Howitt: Smashed it! I really like it. It fits with the art style.
Kori: What would make it more creepy is either a moustache or glasses.
Audience research is research which is purely focused on the audience. The kind of results that you gather are about the audiences preferences, interests, attitudes etc. Finding out their interests would help define what aspects I would like in my game.Quantitative research is very specific and narrowed down whereas qualitative research allows freedom for the in-depth responses.When using qualitative audience research, you are able to engage with a smaller audience to then gather in-depth information back. However, when going with the quantitative audience research approach, you are able to engage with a larger audience and collect a large sum of statistical,brief information back. Combining the two types of audience research really helps define what kind of audience in particular you are working with. Quantitative audience research can be gathered by using methods such as audience ratings and measurement panels whereas, qualitative audience research can be gathered by doing interviews and questionnaires. Audience classification is another route into audience research. It means defining your target audience, Socio-economic audiences is one way of audience classification. Socio-economic audiences are divided up into a grading system; A - Upper Class (Professionals, Doctors, Lawyers), B - Middle Class (Teachers), C - Lower Class (Nurses, Clerical), C2 - Skilled Working Class (Trades Person), D - Working Class (Semi-skilled and Unskilled) and E - unemployed, students, pensioners. This will help with the approach of deciding how much your product would be priced at. If you gain an audience in which the majority fall into the E class, then you would aim your products price lower due to the amount of income that they have. If you aim for your product to be a high price then you may want to target your audience further towards the top of the system. Psychographics is a term for consumers personality traits; personalities, beliefs and attitudes and interests. These are other alternate ways for gather information rather than just using gender and age to define your audience. I began to research what sort of audience ratings the film got. On "Rotten Tomatoes" website, this movie has a "Tomatometer:71%". What the "Tomatometer" is, is the percentage of how many critics would recommend the movie and in this case, 71% of approved critics would recommend the movie. 17 reviews has been counted on this site for the movie, 12 of them were fresh tomatoes and 5 were rotten. 59% of the audience liked the film and the remaining 41% didn't. The critics say "Killer Klowns from Outer Space's title promise darkly goofy fun and more often than not, the movie delivers". After reading up on the rotten tomatoes website,it gave me a good idea on how many people enjoyed the film and reading what the critic said, it gave me a good idea on what they enjoyed about the film. I have conducted two questionnaires in which use qualitative and quantitative data. The first questionnaire which I conducted was called "Killer Klowns Film Review". These questionnaires were put onto survey monkey which allowed for anyone to answer them. The first question which I asked was whether the people who answered the questionnaire male or female, 17 people were male and 2 were female.
The next question gathered data on how old the people were; 10 were 17, 3 were 18 and 5 were 19+.
The third question was asking the people for their opinion on the film, however I gave them a mutiple choice instead of allowing them to write down their thoughts, 3 people liked the film, 8 thought it was okay, 5 disliked the film and 3 hated the film. The next question adds onto this question, I ask them to write down the reason why they chose what they chose in question 3. This question delves in the qualitative research side as I am allowing them to answer in depth whereas the first 3 questions were quantitative questions which gave me solid and brief results which was what I needed to define my audience.
Above are a few of the responses I have back from the people who answered the question. As you can see there are similarities with some of the responses whereas a few others have gone into depth with their answer and added a few more comments. My next question was another qualitative question which allowed them to answer more in depth.
Above is an image of the results. A few of the results were very brief, I was hoping for the majority of the responses to be more in depth rather than have a few words which are the same.
My next question was asking whether the film was made well, 13 out of 19 people thought the film wasn't made well whereas the rest thought it was. This question was a simple yes or no answer. My seventh question I believe was the most successful at getting in depth responses. The question was "Do you believe the film was lacking in some aspects?".
The above image is a screenshot of a few of the responses that I have. Here are a variety of in-depth answers which contrasts against the answers I had received from the previous qualitative question. The last two questions are both quantitative questions. I asked if a game could made from the movie and the results were 11 people believed a game could be made whereas the other 8 thought it wouldn't work. I then asked at the end what sort of game would they possibly like and i gave them 4 choices. The choice which had the most votes was for the game to be a FPS and no one wanted a top down shooter game.
Overall, I believe this questionnaire was successful at gathering information about peoples opinions on the Killer Klown film. The majority of the people who took my survey were young and male so I feel as if I could have done with a few more females to average out the gender ratio and to have a few more older people take the questionnaire. The age and averaging out of gender may have made a difference or it may have not.
My second questionnaire was going into detail on, if I made a game, what would they prefer. The first question I asked was whether they preferred a shooter or a stealth game. The majority preferred the shooter version rather than the stealth version which is something that I wasn't quite sure on as my idea for the game was to be more stealth and assassinations then shooting. The image to the left shows the results of the first question.
This image to the left is a screenshot on the results from the second question. I feel as if the results from this question were heavily influenced by the other question as most people prefer first person shooters than third person shooters.
The results for this are varied. Although, the majority of the vote went for a horror/gory game which goes against what the film was whereas, the next highest voted choice was for the game to be funny and that is the genre of the film.
For the fourth question, I got great results. Relating back to the film, I got them to tell me what they would like from the film in the game. The majority of the responses I got back were very different. This gave me a real insight into what people wanted and it gave me many ideas to think about.
The next few questions were both questions in which the people had a choice of what they wanted in the game, what sort of perspective they would like to play from, what weapons they would like to use, if they want the game to relate to the film and where would they like the game to be. The final question which I asked was how much would they be willing to spend on a game. This question touches lightly upon the socio-economics side.
I believe I should have asked a few more questions based on the socio-economic side to find out more of my audiences background and then ask a few more questions which relate with the psychographics to find out more about the audiences personality. The balance between the quantitative questions and qualitative questions was quite even, a few of the results I got back were in-depth whereas a few weren't. The lack of in-depth answers proved to me the little interest that they had the film in overall.
Task 2:
Title: The Last of US
Genre: Action-Adventure, Survival, Horror.
Selection of Content: Dark, Apocalyptic world,
Construction of Content: Narrative
Narrative Conventions: Story Driven game, apocalyptic, need a cure.
Codes and Conventions: Health, Killing a horde of enemies, variety of use of weapons, third person.
Target Demographic: Young Adults
Title: Thief: The Dark Project
Genre: Stealth
Selection of Content: Dark, first person, fantasy/middle-ages,
Construction of Content: 12 Levels
Narrative Conventions: Three organisations, protagonist pursues a life of thievery, wanted for failure to pay a protection fee
Codes and Conventions: Visibility gem, Health Bar, parts of the HUD disappears when items are not in use, First- Person.
Target Demographic: Young Adults (Majority Males)
Title: Lost Circus
Genre: Stealth
Selection of Content: Dark, Cold, Carnival/Circus, fantasy
Construction of Content: 3 Levels
Narrative: Protagonist Abandoned in unknown place, uncover whats happened with the place and the odd doll, escape
Codes and Conventions: Health, Stamina, Visibility, Third person, variety of weapons
Target Demographic: Teens/Young adults
Media Text:
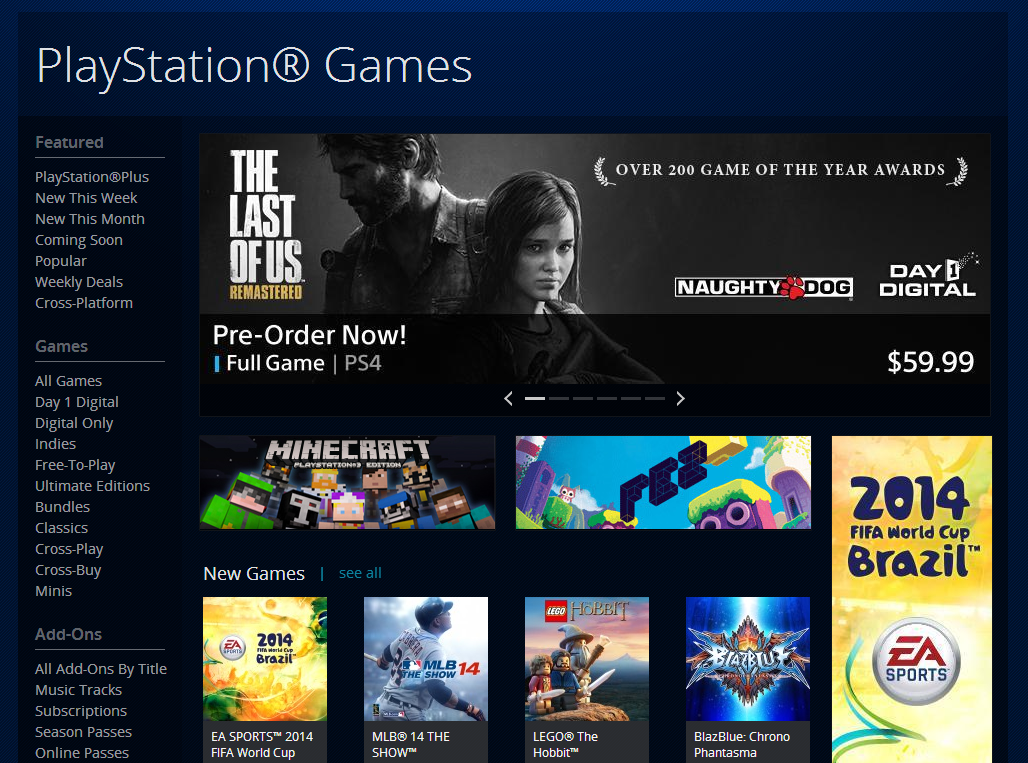
Media Text is information in which can be viewed by the public. Examples of this are; Advertisements, Posters, TV Commercials, leaflets, magazines, etc. The Last of Us for example has advertised using trailers and posters but also advertised on the PlayStation home page which is a strong contender for when wanting to advertise a game, place an advert on the gaming console itself. The content that is displayed in the trailer and the age disclaimer at the bottom of the advert at the start, shows that there is violence and that the game is aimed towards and adults/teens. The dull colours and the derelict world really emphasises the apocalyptic theme within the game and the start really emphasises this. Below are three examples of the advertisement they have created for the game, the last one is the reveal at E3 which is a huge event where future games are showcased.
Thief: The Dark Project was a game which was first advertised in 1997 E3 so, the graphics to the trailer isn't the best compared to what we watch now. The game is very dark and again contains violence so this game is towards towards adults/teens.
Lost Circus: The way I would go ahead with advertisement is how The Last of Us had advertised their game. They advertised using video commercial/trailer and advertising the game on the platform that it is made on. Both games above have been advertised at E3 which really gained a lot of attention so that is something that would really be beneficial. However, considering it is a relatively small game that would most likely be released on PC, for it to be advertised on Steam would be a plus.
Genre:
A system has been developed to file through all of the different types of films/games/programs and this system is known as Genres. When it comes to video games, there are lots and lots of different genres and this helps the players find games which they prefer playing easier. Some genres are a lot more generic than others, for example; Shooters, FPS (First-Person Shooters) and TPS (Third-Person Shooters). Lots of other genres consist of; RPG, Puzzle, Simulations, Platforms, Sports, Strategy, Dance/Rhythm, Survival Horror, Fighting, Action, MMO, Fantasy, etc. [1] More than one genre can be used to describe the game, The last of Us is an action-adventure, survival horror game, ARK: survival evolved is an Action-Adventure, Survival, open-world game. Defining the games more narrowly helps narrow down the search for what the players are looking for/interested in. My game fits into a few of the genres that the Thief: The Dark Project fits into more than The Last of Us as the Lost Circus is dark, cold and Fantasy based.
Selection of Content:
The selection of content is, what are the creative points of the game? What are the colours that have been used, the tones, the fonts used and the sounds? Furthermore, why have they chose that content? For the game series "Dark Souls" they have used dark colours and tones throughout their games and this reflects upon the story and the nature of the game. My game is going to contain dark colours and tones which is similar to Thief: The Dark Project more than The Last of Us. The colours contained within the The Last of Us are quite still quite bright but that just makes the game environment appear beautiful despite being in apocalyptic world whereas where in my game, I want to portray the darkness that looms over the circus and the story.
Construction of Content:
The construction of content is what the games layout is, whether the narrative is prominent or not and how the game is constructed. This meaning if it has levels, what is guiding the player through the levels, is it the story, or is it something else. In this case, what is guiding my player through the levels are quests. The first quest would be to investigate the area they have awoken in and then to investigate the strange music and so on. Again, this is then similar to the Thief: The Dark Project game than The Last of US as Thief has levels.
Codes and Conventions:
Codes and Conventions are the visual elements to game, such as the HUD. Semiotics is a big play for this subject. Semiotics is a study of symbols and the meaning behind them, this relates to the HUD. For example; In Dark Souls 3, The red line at the top symbols health, the blue bar symbols your mana/magic/attunement and the green bar symbolises your stamina. When the bar is empty it means you are either dead *red*, Can't use anymore magic *Blue* or you can't run for a certain amount of time *Green*. Even in ESO (Elder Scrolls Online), the HUD contains a red line at the bottom which is your health, the green bar in the bottom right is your stamina and the blue bar in the bottom left is your mana/magic. These 3 colours really help gamers define what is what on the HUD. What my game is going to have bits and pieces similar to both games, such as a Health bar, variety of weapons and a HUD which disappears when items are not in use.
With coloured bars being an indication to what they are used for, symbols can also be used. For example; in the game "ARK: Survival Evolved" they use a variety of symbols in the bottom right for your character. Usually, the names would not be hovering over the symbols however, the names help new players understand the symbols. The symbols help the players quickly read what they symbolise rather than reading actual words to find out what is wrong with their character.
Target Demographic: Target Demographic is who you are trying to make your game appealing to. This could be a particular gender, age, background etc. Games which are photo realistic are more appealing to adults than children and children would more drawn to games which are bright and colourful. Furthermore, when finding your target audience, it is ideal to do lots of market research. If you half heart the market research, you may end up in fault for not appealing to one sex more than than the other when actually you want it to appeal to both. My game I would like to appeal to both genders and teens/adults. The Last of Us appealed to both genders of gamers however I believe to think that Thief: The Dark Project appealed to more males than females.
Client Brief/Own Brief:
The Client brief is for the game to relate to the movie "Killer Klowns from Outer Space". The brief can be interpreted in many ways and is left open for us to do so.
Below is a link to my blog which contains my own briefs and ideas for the game. It includes three different game brief ideas and model ideas. http://amyjadeflanagan.blogspot.co.uk/2016/11/killer-klown-game-brief.html
Below is my Padlet link. My Padlet contains lots of ideas for the models that I am going to create to be put into my game. It contains a few ideas for the environment, the weapons, the enemy models, colour schemes and generates the atmosphere that I want to create.
https://padlet.com/wall/474zsva3c91u Video Link: https://www.youtube.com/watch?v=WVyA79MkTuI&feature=youtu.be Legal & Ethical Considerations: Killer Clowns in the Media:In late 2016 around October time was a huge "craze" of Killer Clowns. The craze originally started off in America and then it began to spread to the UK. With this craze, it left the subject of creating a game about the film "Killer Klowns from Outer Space" sensitive. Therefor this being a sensitive subject it may be difficult to gain public interest. Many news reporters and the general public has reported many sightings of people dressed up as clowns, many were suspected to be wielding weapons whereas few others were dressing up to genuinely scare others.
The link below is a reference to where the craze started and where it spread to. Furthermore, of suspected people dressed up as a clown and potentially holding a weapon.
http://www.usatoday.com/story/news/world/2016/10/12/killer-clown-craze-united-kingdom-canada-australia/91936098/
This link below is another example of the news reporting sightings of killer clowns in the UK.
http://www.bbc.co.uk/news/world-europe-37612735
Age Rating: Legally, the game would need be appropriately rated. PEGI have a system which The age rating that I would give my game is a 16. I have read up on the PEGI ratings system and looked through each of the PEGI age ratings to see which one best fits the game idea I have in mind. PEGI 16 is a rating which allows violence/sexual activity which is how it would play out in real life. PEGI 18 on the other hand takes it to the next level to the point where this violence becomes gross violence, something that would make the player "feel a sense of revulsion".
Religion: The game taps into the religious side slightly as in the brief I created, I had the idea of a spirit in a doll. The spirit would be a young girl which was killed by the enemies in the game (the Killer Klowns) and she seeks revenge however, she helps you out so you do not end the same way as her. There are many different views upon ghosts/possession and dark spirits. As possession/ghosts and dark spirits are a sensitive subject, understanding the full potential behind the three and defining what sort of "spirit/possession/ghost" this is, is quite difficult. After doing some research, possession usually falls under the definition of a "demon" and devising the dialogue for the young girl, I would not want her to use the wrong terminology.
Gender/Race: If left all the clowns to be male and the main character to be female there would be many interpretations into what this means. The interpretations could either be seen in a positive light or a negative one. For example, the female is no longer a damsel in distress which needs to be saved, furthermore she is the main character and not a supporting role to a male. A negative could be seen as, if the enemies are all male then it means that there would be no female villains and would then place a bad name on men as if they are the only ones that would kill and women would not. The enemies are going to be mixed race and mixed in gender. I have took into consideration the race of the main character and she is going to be a British young female whereas the race of the enemies and the young spirit is mixed.
Specifications:
When wanting to import my own textures that I create for the landscape in Unreal Engine 4 and for models in Maya, I figure that it would be best to save the images as "Save for Web" or "Taiga" as this would then keep the resolution and it would reduce the file size. Another consideration is to keep the poly count down at a nice number due to the amount of models that it going to be implemented within the game. I wouldn't want the poly count down too low due to the style I would like my game to portray. The constraints that I have is time, making the models, texturing them and them importing them and placing them in Unreal consumes a lot of time so I the pre-production planning would come in handy and would help me keep focused on what I want to create and not just creating/texturing models from no-where.
Killer Klown Brief: AI: Enemies Chasing you (Killer Klowns? People?) Concept Art:
Image Planes for Maya
Character Sketches
Landscape sketches
Building ideas (Circus Tents/Fountain/Lamp Post/)
Intractable objects (Glass shards/Doll) Models: Maya models;
Clowns
People
Weapons
Killer Klown
Game Ideas:
Idea one: Story: You
are Killer klown which has crash landed on Earth. Your ship is broken and you
look around the Earth for bits and pieces which can help rebuild your ship. As
you are searching around, the humans see that you are no ordinary clown. You
have killed a few humans to retrieve a few of the pieces of your ship and the
other humans have witnessed the crime. You are being hunted by the Humans and
you must collect all of the objects before returning to your broken ship. Player:
Clown (Bobo) Objective: Make your way to the forest
where the ship first landed to find the remote and call for a ship to go home
in.
Humans are going to hunt and attack you. Weapons:
You found a Candy Matter gun on the ship, the only way for you to collect ammo
is by picking up candy pellets. The gun shoots out blue/pink/purple bullets of
matter at the clowns.
IDEA TWO: Story: You are a human and
you have made your way onto the ship which has set off to the Killer Klowns
home planet. You are a human who is curious as to who these Killer klowns are,
why they invaded Earth and you are curious as to how to destroy them. Player: Human (Male/Female) Objective:
Make your way through the circus tent and through the planet to find the place
where the head killer klown lives. Weapons:
You found a Candy Matter gun on the ship, the only way for you to collect ammo
is by picking up candy pellets. The gun shoots out blue/pink/purple bullets of
matter at the clowns. First Area: You are inside of the Circus tent, there is
a podium in the centre with balloons trapped in by the pointed ceiling,
confetti on the floor and all sorts of gymnast equipment left lying around and
a door way is visible at the edge of the room. Furthermore inside of the room
is your first weapon. You can pick up the weapon and is has a full ammo clip.
You can explore the different rooms in the circus tent however all they contain
is a few killer klowns and ammo. Second Area: Open planet map filled with trees which have bows on
them and bushes which are bright and colourful. You can explore however you
will attract killer clowns along the way to so you have to shoot them. Third
Area: Boss circus tent, bright red and yellow, huge killer clown
inside which tries to kill you, you eat some of the cotton candy on the floor
and your health doubles up.
IDEA
THREE:(Preferred Brief)
3D immersive, third person shooter. Can be played with not needing to shoot at
all. The clowns will have specific roaming areas, the player can either be
stealthy or wait for them to walk on by or the player can use their weapon and
shoot them up. All of the clowns have no eyes so they will be dependant of
their hearing. The sight sensory will be lower than the height sensory.
Age
Rating/Audience: 16+.
The reason behind why the game is targeted for 16+ is due to the type of game I
want this to be. Dark,Creepy and Spooky.
Environment:
Carnival *Haunted look*
Abandoned Circus Tent
Hall of Mirrors
Dark Forest
Colour
Scheme: Dark tones of all colours, dark yellows, reds, blues,
greys, purples and whites. Protagonist:
You (Female) Shirt, jeans and boots. (100 Health). Character Name: Elva Antagonist:
The Killer Clowns: Some may just be stumbling clowns wearing straitjackets
which try to bite you. (Takes off 10 health) (Black, white and red colour
scheme)
Some may be holding a melee weapon to hit you with. (Takes off 20 health)
This allows the player to experience different types of enemies so it’s not the
same thing over and over. Models:
Trees, Bushes, Fences, Wagon, Mirrors, Path, Ferris Wheel, Circus Tent, Torn
cloth, shooting weapon, lamp posts, podium, tiny doll, knives, killer clowns, glass shards.
Tiny Doll: There will be a Tiny doll which follows you from the
moment you jump out the wagon, this tiny doll is the one that set the
protagonist free in the back of the wagon, furthermore, once hurt, this tiny
doll will heal back some of your health when given clown blood. The story behind
the tiny doll is that the clowns which possess over the abandoned circus tent
killed a teenage girl which now possess the tiny doll.
First
Level: You wake up in the back of a
wagon with a weapon beside you, you hop off the wagon and you are inside of the carnival area. You hear music playing from inside the
circus tent. (The player can then explore the area if they wish too, they can pick up glass shards which are auto added into your ammo slot.) You then enter the tent and then the entrance becomes blocked off.
(I believe this entrance is quite interesting considering it leaves a sense of
mystery as to what happened and why you were in the back of a wagon. The music
from inside the tent is a hint to player as where they have to go next, giving
them a weapon early on is also a hint to they will need to fight something off)
Second Level: Enters the circus tent, everything looks torn and
broken. A lot bigger in the inside than what it looks like from the outside,
you run into a few clowns which are zombie clowns, they try and kill you with
their melee weapons. Looking for a lever which opens up the hall of mirrors
which is connected to the tent.
(The circus tent links in heavily with the idea of a carnival and clowns, the
fact it looks abandoned adds more on to the sense of mystery and uneasiness,
the fact the entrance closes means that the player now knows that this tent it
not occupied by people and actually there is more happening that meets the eye.)
Third Level: You head down
to the spot light which then activates a light for the room, it’s a large room
full of mirrors and killer clowns and you are running around shooting these
clowns but also trying not to run into a dead end. You then are in search for
another level which opens up a door and leads back to the carnival, through the
forest and then you run and find a car in which you can escape in. (The hall of
mirrors adds a sense of objective to the game, you now know that you need to
escape however it is not as easy to escape due to the hall of mirrors being a
maze. The clowns added into the maze makes it difficult for the player to
escape and survive).
HUD: Clown Blood
*appears as glass with blood on*
Ammo: Collecting glass shards *appears as a glass shard with the amount of ammo
next to it*.
Stamina bar: Appears in the top left of the screen. Runs out after 15 seconds
of running *regens*.
When heavily injured screen starts to turn red. Music:
Atmospheric, Horror-spooky theme. Noise plays when picking up an item. A giggle
plays when you give glass with blood on to the doll. Gurgling and growling from
the killer clowns are heard when you are close by to a clown. Model Ideas:
The two images of above are melee weapons in which the enemies will use and wield. The image of the doll is a reference to how I would like to model the Tiny Doll in which follows the player. The clown to right is a reference to how I would like to design one of the clowns in which cannot use his hands.
This image to the left is reference image as to how I would model the entrance/exit to the carnival area in the first level. I think it adds to the creepy/strange level and of course it is a clown which fits perfectly in with the theme of my game.
Above is a reference to the sort of atmosphere and layout of how I would like the first level to look like. The dark clouds and light fog creates the spooky atmosphere. Furthermore, the direct path in the middle with carnival stalls and the carousel surrounding the path is the idea I had for the layout.
The use of concept art is to essentially generate ideas for videos games, animation, movies and so on. It is an illustrative form of ideas in which you want to implement into your game. For example, you create how your characters will look, what they will wear, what objects you want in your environment etc. It is also considered to be visual development. Particularly in games, it is a great way to see whether the designs are fit for purpose, whether they match up to what the clients brief says. With environments, it is a great way to see what the level design would look like and what sort of atmosphere/mood is generated. If too many people feel something which doesn't correspond with the brief then a new idea is most likely generated. Furthermore, with the ideas being in a illustrative form, it is easier to draw/sketch the ideas than to already model them.
Here are a few of the stages of the development to creating the final piece of what I had mind. This is the first stage, adding in the basic areas and a few of the objects in, deciding on the placement and working on the placement of the spotlights lighting.
This is concept art of a level I have designed using the program Photo-Shop. I have tried to create a creepy atmosphere by using dark colours, spot lights and torn cloth. The lighting really emphasises on the dark doorway near the centre of the image. The reason for this is so the player is more focused on where to go and the dark doorway adds a spark of suspense as to what is lurking in there.
The darkened edges of the images and the darkness of the stars added more of an atmosphere to the place. The stars at first looked out of place and did not fit in with the image well and the darkened edges added a dramatic effect and really emphasised the lighting which lights up the doorway and the curtains. Although the darkened edges feel a bit too heavy in the room and doesn't look quite right. Below is the final design.
Below is concept art of an environment from the game Dark Souls 3. This area is recognisable from the game, it is one of the first areas that you as the character enter. A lot of the colour tones and shades are fairly similar and dull. This creates a dark, weary atmosphere. The scaling of the building in comparison to the character is huge and this creates a daunting vibe as if the building is hanging over the player, as if it is taunting the player and trying to consume them within the darkness of it shadows it is casting. The faint glow of embers next the fountain adds a faint light to the area however, what it illuminates is quite a dark subject. It shows a cluster of body armour of which must of been worn and then in the far right corner is an image of a fallen knight with swords throughout the armour, this adds further darkness as more death is displayed throughout the lower half of the image.
Below is an image of concept art for the enemy called the Harvester from the game Elder Scrolls Online. What this image displays is a course of images in detail of the design for the enemy. There are close ups which really shows the design up close and shows what sort of design they wanted they created. The front and back view of the enemy gives us a good idea on what the enemy will look like from different perspectives and also the closes will show what the even the smallest part of the enemy will look like. The colours and tones add a great touch to the image as it gives off the vibe of a dangerous enemy in which wields the power of magic, the dark tones throughout really reflect upon the personality of the enemy that it is evil and dark.
This is another image of concept art from the game Elder Scrolls Online. This is an image from the Dark Brotherhood DLC and it includes what the character armour is in light, medium and heavy and then what the different weapons look like in the dark brotherhood style. The characters in the middle display clearly the different armour from an appealing angle. The colours which are chosen as the base colour for this armour reflects on the name of the armour style, the "Dark Brotherhood". As a bit of background information, the Dark Brotherhood is known for killing another whilst hiding in the shadows, the dark tones of red reflects the colour of blood and the dark grey tones help to hide the wearer within the shadows.
There are a few stages into creating your final piece of concept art. First off, a few different quick, colourless sketches are needed to jot down the ideas that are rushing around in your head. These sketches may include different angles of the character/object.
For example;
Then stage two consists of choosing which sketch you like the most or which the client likes the most and then adding a palette of colour to the image. The roughness of the colouring in acts as a guide of what sort of mood and atmosphere you want to create.
Stage three consists of adding in the outlines of the object, well in this case adding in the outline to the bike, the wheels, the character, her clothes etc. Furthermore, this allows you to add more colour on top and detail of colour into the areas where you have roughly painted over before.
The final stage is adding lighting to the image to create the mood and atmosphere and to make particular parts of the image stand out the most.
3D is applied to a lot of different subjects such as games, product design, TV, film, education, architectural designs, animations etc. When it comes to applying 3D into these different subjects, they are all used in very different ways. A lot of architectural designs rely on 3D models and animations. The reason behind this is so that a person is able to view what this future build will look like from every angle. Furthermore, the 3D model really covers the scale of objects. It also allows the people that are viewing this architectural idea a good idea of what it would look like in reality.
This video clip is a great example showing what a 3D architectural animation looks like. The colours and the different perspectives it offers really gives the viewer a taste of what it will look like in reality. The scale of the people compared to building also adds a great effect to how big this build will be. If this was a 2D animation of how the build will look like, we wouldn't be able to see the true scale of the objects and buildings, furthermore, we would not be able to look from other perspectives in case something needs to be changed, into a better design. This video did not only cover the overall designs of buildings, but it also included animated people and considered how the environment would look to. The animation really livens up the whole video and adds a great overall environment.
Product Design:
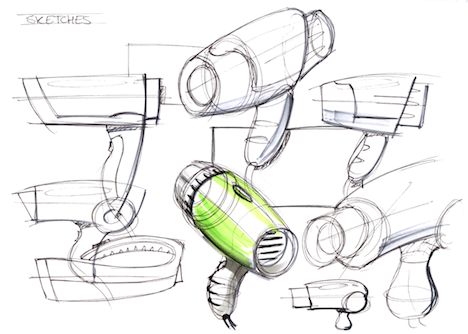
Product design also uses 3D software to create models which allows the user to get a good feel of how the product will look when it is it finished. It all comes back to the scale of the product, the colours, the size, the size of the components and so on. Drawing 3D sketches is one point of gathering a good idea on how it will look like from different angles, however it would cover all the angles as much as a 3D model would. Furthermore, a 3D model can give you accuracy moreover than a 3D sketch of a design for a product.
This video clip is a someone's portfolio of products that they have created, designed and rendered in. They have included different perspectives of what the products would look like, the size comparison of the components, colours, lighting and so on. This portfolio is a great example of a bunch of different products which have been 3D modelled.
Games:
Games are heavily reliant on 3D models. 3D models are now used for most games whether they are cell-shaded type games or photo-realistic styled games. What game developers create with 3D modelling software are the characters which are contained within the games, objects, weapons and environmental objects. The models are essential to how the game plays and looks overall. The character models are needing to follow the sort of styled game you are going for. Whilst using the 3D software for creating models for a game, they can also create the animation for those models with the software. For example, Maya.
This video clip displays a man creating a video game character which is going to be a part of a real-time game. This is a video which has got the speed increased to show how he has used a 3D modelling software to create the desired character that he has wanted to sculpt. The program allows him to rotate his character to be able to see the model form all perspectives. This helps him see if all of the proportions are right and correct.
Animation/Films/Tv:
3D animations require 3D models which are then rigged using a 3D software program. 3D animation really draws in the viewer due to the colours, models and lighting. 3D animations have now replaced the old style of how animations were made. The way animations were made before 3D software, it was drawing the animation frame by frame. Now with animation, you can use rigging on your 3D models. Rigging is essentially the skeleton of that object. A skeleton has joints and bones, animators are able to adjust and change the pose at which they want the model to stand as/sit as and so on.
When it comes to films and Tv, they use 3D software differently. Game of Thrones is a good example as they use 3D software to create visual effects within the episodes. Green screen is often used to also create 3D backgrounds for the scenes within films and TV episodes.
This is a great example of showing how animation were done before animators could use 3D modelling programs. Throughout the video, it shows us how they would first create a frame and then how they would add colour to that frame and then add into a scene.
Both videos shows a great contrast between how animation is made now and how animation was done back then.
This video clip is a short animated 3D film.This is a great example of a result from making a 3D animation short film by using 3D modelling software.
This relates back to the example of TV shows using 3D modelling software and green screen to create 3D visual effects within episodes of a TV series.
Time spots:
5.16-6.00
Displaying 3D Polygon Animations:
API which is Application Program Interface interacts with GUI components. An example of an API is Direct3D. Direct 3D graphics are used to create 3D graphics for games and other uses. It is an API which works with the Windows OS and is a low-level graphics API in which can also take advantage of hardware acceleration such as graphic cards. It is used to render 3D objects without sacrificing performance. OpenGL stands for Open Graphics Library and is another API which was originally developed by Silicon Graphics in 1991. It is said that the OpenGL is widely used, it supports 2D and 3D graphics and can be used on a variety of computer platforms. The high visual quality and performance helps produce and display brilliantly compelling graphics, whether 2D or 3D. SceneKit is another API which is specific to an OS. SceneKit is an API which is specifically for Apple. What makes this different form OpenGL is that, with SceneKit you do not need to input deatil into the rendering algorithms it has, you only need to do a descriptions of the scene's content and then describe the animations/actions you want the SceneKit to perform.
Graphics Pipeline:
Modelling
The graphics pipeline for Direct3D 11 is "designed for generating graphics for realtime gaming applications". The diagram to the left displays the orders of stages on how the pipeline works. Altogether there are 10 stages that it goes through; Input-Assembler Stage, Vertex Shader Stage, Hull Shader Stage, Tessellator Stage, Domain Shader Stage, Geometry Shader Stage, Stream Output Stage, Rasterizer Stage, Pixel-Shader Stage and Output-Merger Stage. The Input-Assembler gives data to the piepline such as triangle, lines and points. Then the vertex-shader stage processes the vertices and takes a single input vertex and produces a single output vertex. It carries out procedures that are to do with transformations, lighting and skinning. The geometry-shader can get rid of/create one or more primitives. What I mean by the term primitives are; 1 vertex for a point, 2 vertices for a line and 3 vertices for a triangle. Furthermore, it supports limited geometry amplification and de-amplification.
The stream-output stage connects with the memory and the rasterizer. It streams the primitives from the geometry shader and delivers to the memory which is on it's way to the rasterizer. When the data is streamed out of the pipeline and into the memory, it can go back around and back into the pipeline as input data/read-back from the CPU. The rasterizer stage prepares the primitives which were streamed from the stream output for the next stage, clips them and then determines how to call forth pixel shaders. The pixel-shader stage generates per-pixel data (colour) for the primitives. The last stage is the output-merger which then combines the many different types of output data to generate the final result. The three stages in which I missed out were the hull-shader, tessellator and domain-shader stages. These 3 shaders are all tessellation stages. They basically convert high order surfaces to triangles.
When it comes to rendering, it means changing a model into an image, however because this image is a model (3D) , it would include textures, shading, lighting, viewpoint etc. Parallel rendering uses parallel computing which is many calculations that are all carried out/executed at once. The reason behind why parallel computing is used is due to the complex scenes which can be created that are scientifically visual. For example; Radiosity. Radiosity is a method of detailed analysis of light reflections. This is one of the complex visuals that are included within parallel rendering. There is an equation in which radiosity uses; Idiff = IePd(Ue+Un). Un is Normalised Surface normal, Ue is Normalised Vector Pointing from surface to light source, Pd is Diffuse reflectivity of surface, Ie is intensity of light source and Idiff is Diffuse light intensity.
As you can see above, the radiosity has added a softened light effect into the room and has also add a realistic light effect to the scene. Furthermore, it has created shadows within the room which are subtle and soft. Ray tracing is a technique which generates an image by tracing the light generated on 3D graphics. What it tries to do is simulate a path of light rays which bounce around the world, then they are traced through the scene.
Rendering Engines:
There are various amounts of rendering engines which are available. A rendering engine is software in which reads pixel data from a file system and then draws text and images on the screen (map the pixel data).
I have found a website in which tests and compares a few rendering engines. How they test them is they create a scene within blender and then they render the scene. The numbers in the bottom right are actually how long it took for them to render. The lower the render time the better the rendering engine was. For this scene in particular, you can notice differences within the scene. For example, if you look are all of the green end tables, some are textured, some are quite plain, and they are all different shades of green. This scene also tests how the indirect light would work within the scene.
This comparison is a great example to show there are different types of rendering engines which work all different and it shows the capability on how they can handle certain scenes.
https://www.blenderguru.com/articles/render-engine-comparison-cycles-vs-giants/ Geometry Theory/Mesh Construction:
When it comes to 3D modelling, you first start off with a choice of different shapes in which you can use. However, how these shapes become models is a different matter. With the polygons, you are able to adjust and change the shape by editing where the vertices are place, which angle the edge is tilting, adjust the size of a face on the shape and so on. A mesh is a collection of; vertices, faces and edges. In Maya, you can switch between what mode you view your model in, there is a wire frame mode, shaded mode, shaded with hardware-rendered texture, wire frame on shaded, default material etc. Furthermore, there are different model types; Polygons, NURBS and Subdivison Surfaces. Polygons allows the user to model a surface by building it up and reshaping it and so on. NURBS lets you easily create curves using its tool, these curves can then be created in models. Subdivision surfaces allows the user to edit surfaces with minimum overhead data. Here is a preview of a few polygon primitives. These are also a few of the common primitives which are used within 3D modelling software.The image below displays the primitives in their shaded mode.
Below is an image of three polygon primitives in wire frame mode. The wire frame mode allows you to keep easy track on your models within the panels view. Furthermore, you can change the colour of the wire frame for each model, so it is even more easier to keep track on where all of your models are.
This is an example of a model that was created using NURBS. To create this they used a CV curve tool (Control Vertices). NURBS are Non-Uniform Rational B-splines. NURBS are most commomly used by designers who model for industrial/automotive designs. The reason behind why they use this is due to the smooth forms that they can create. They can also be converted into a poly mesh.
These example are from the software Maya. These two images on the left are an example of using the extrude tool. The first image on the left is; i selected the far right face of the polygon and then selected to use the extrude tool. Then by pulling the yellow arrow (was blue before, but when you click on an arrow it highlights it yellow) you are extruding that face outwards the right. You are able to extrude any face in any direction. However, if you extrude a face and push it inwards it will then extrude into the box. You can model a box in various different ways. If you press F9 you will be in vertex selection mode.If you click on a vertex, you are able to move it around by using the arrow keys. Another mode is edge selection mode (F10). With this, you are able to select what edges you would like to move around, resize, delete etc. When you hover your mouse over the edges of your model, they will be highlighted red. F11 is the mode for selecting faces, which is the mode I used for selecting the highlighted orange face in the images to use the extrude tool on. The last mode which is quite significant is the object mode (F8). This allows you to move the model around as a whole, rotate it and resize it. When you are in object mode, the model will be highlighted green, when you are in the other modes, your model will be highlighted in blue.
The image at the bottom is a reference to box modelling. The shape below was a cube however, I have used the vertex selection tool to model the primitive into what I desired.
3D Development Software:
There are many different 3D development software in which is available for designers. Considering there is a variety of 3D modelling programs, it allows the designers to choose the correct software for them and their purpose. The different 3D modelling programs also vary in which tools they have and what they cover. 3D Studio Max;
3D Studio Max 2016 software is supported on 64 bit OS's such as; Windows 7, 8 and 8.1 whereas 3D Studio Max 2017 is supported on; Windows 7, 8, 8.1 and Windows 10. It requires 64-bit intel or AMD multi-core processor, 4GB of RAM minimum although 8GB is recommended, 6GB of free disk space for the install, and a 3 button mouse (left, right and middle button). 3D studio max is a software program which designers use to model, animate and render scenes. It supports DirectX11 shaders and has tools for particle animation, crown generation and perspective matching. This is commonly used for games, films and motion graphics. Below is an image of the 3D studio max HUD.
Maya:
Maya is another 3D modelling software which allows for designers to model, animate and render in scenes. Maya is a 3D modelling program that I use so I know what is on the HUD and how to access the different areas of Maya in which will suit my needs. Maya has next-gen display technology and has tools in which can handle complex data. Maya software requirements are windows 7,8,8.1 and 10, Mac OS X, Red Hat Enterprise Linux and CentOS 6.5 Linux OS, 64-bit Intel/AMD multi-core, 4GB of RAM (8GB recommended), 4GB of free disk space and 3 button mouse.
Lightwave: Lightwave is another 3D modelling program which is supported on Windows and Mac. For windows machines, Intel/AMD Athlon 2 Processor or better, 64-bit system RAM 4GB, 32-bit system 2GB minimum, 64-bit Windows vista up to Windows 10 and 32-bit Windows Vista up to Windows 10. For MAC OS, Intel Processor, 64-bit system RAM 4GB minimum and Snow Leopard 10.6 or better. A few of the feature that they have are; Bullet (Constraints and Motors), Importance Sampling (Better, cleaner renders), Match Perspective (Plate matching in minutes), Genoma 2 (Fast, flexible rigging), Edge Rendering (Improvements), Interactive Dynamic Parenting (Parent with ease) and Enhancements (Feature Improvement).
Constraints:
There are constraints however to developing in 3D software. One of those is the poly count (Polygon Count). If there is a high poly count, the game may just freeze over and not work due to how much needs to be rendered in. On the other hand, if the poly count is low then it will be able to run a lot smoother. There are also limitations which are in place. For example, when it comes to the app store, their limitation is the maximum size of the app which you are allowed to send to be reviewed and placed within the store. The maximum size of the app before February, 2015 was 2GB, after that time period it is now 4GB. Another constraint is the rendering time. If you create a scene with a high poly count, high quality textures, lighting, shadows etc, the rendering time will be quite large. This could possibly be cut down by a small amount dependent on the rendering engine you use.
 To start of the model I needed some guidance from image planes so I can make the generic shape of a human body. I then used the cube polygon to create the body, using the shortcut keys F8, F9, F10 and F11 I was able to quickly switch between object selection, vertex selection, edge selection and face selection. I changed the subdivision width and height to add in more vertices and edges so I could mould the polygon into the body shape. Selecting the vertices and moving them up down with the shortcut key "W" allowed me to mould the cube even easier. I then did the same routine with the right leg, the right foot and the right arm. I used a cube polygon, selected the vertices/edges and moulded the shape by moving/resizing the shape to fit the arm/leg. I did all of the moulding from the front perspective, when switching to the side view the polygons were all too fat, using a side view image plane helped me adjust the body parts to the correct shape and proportions.
 This screenshot shows four polygons moulded into shape, the problem here is that they are all separate. What I did to combine them together was first clicked on all the pieces whilst holding shift and used the combine tool. What this did was grouped them together. The pivot tool was off centre at this point so I used the "center pivot" tool to move the pivot back to the center of the model. Then in edge mode I selected all of the edges that would not be seen if I connected the polygons altogether. These areas were the top part of the leg, the top part of the shoe and the inner shoulder. Once I had removed the edges, I then removed the vertices then was connected to the edges. The reason behind why I did this was due to making it easier when connecting the vertices together if they had the same amount of vertices in each area I was connecting to. For example, the inner shoulder could of had 6 vertices and on the body where I want to attach it to, has 4 vertices. I would need to take away 2 vertices in the inner shoulder for it to fit right. When I had finished with vertices and edges changes, I then used the target weld tool in vertex selection to weld the polygons together.