Be
able to create 3D models following industry practice
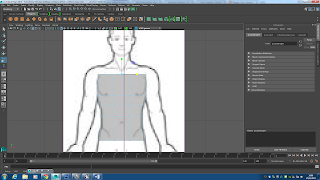
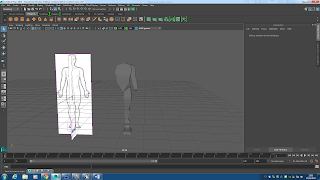
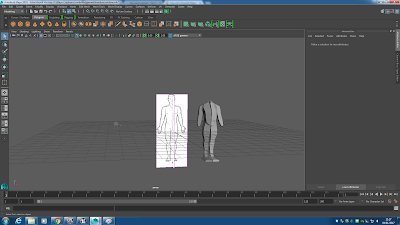
 To start of the model I needed some guidance from image planes so I can make the generic shape of a human body. I then used the cube polygon to create the body, using the shortcut keys F8, F9, F10 and F11 I was able to quickly switch between object selection, vertex selection, edge selection and face selection. I changed the subdivision width and height to add in more vertices and edges so I could mould the polygon into the body shape. Selecting the vertices and moving them up down with the shortcut key "W" allowed me to mould the cube even easier. I then did the same routine with the right leg, the right foot and the right arm. I used a cube polygon, selected the vertices/edges and moulded the shape by moving/resizing the shape to fit the arm/leg. I did all of the moulding from the front perspective, when switching to the side view the polygons were all too fat, using a side view image plane helped me adjust the body parts to the correct shape and proportions.
  This screenshot shows four polygons moulded into shape, the problem here is that they are all separate. What I did to combine them together was first clicked on all the pieces whilst holding shift and used the combine tool. What this did was grouped them together. The pivot tool was off centre at this point so I used the "center pivot" tool to move the pivot back to the center of the model. Then in edge mode I selected all of the edges that would not be seen if I connected the polygons altogether. These areas were the top part of the leg, the top part of the shoe and the inner shoulder. Once I had removed the edges, I then removed the vertices then was connected to the edges. The reason behind why I did this was due to making it easier when connecting the vertices together if they had the same amount of vertices in each area I was connecting to. For example, the inner shoulder could of had 6 vertices and on the body where I want to attach it to, has 4 vertices. I would need to take away 2 vertices in the inner shoulder for it to fit right. When I had finished with vertices and edges changes, I then used the target weld tool in vertex selection to weld the polygons together.
Once I had finished welding body parts together, I selected half of the body using the face selection tool and pressed delete. The reason behind this is, when I mirror the body, it will have a nice cut to the join up the pieces together. I did the same technique joining these halves together as I did combining the body parts to the body.
My next aim to focus on was creating the head for the body. I wanted the head to be quite different from a human head, considering the model is going to be a killer clown, an abnormal head would give it that creep factor. I started off with the basic cube polygon and used the same technique as before when moulding the shape of the body.
I combined the head to the rest of the body using combine and then used target weld to merge it. Then for the face features I used the face selection took, selected certain faces and then used the extrude tool to either push in the faces into the face or pulled out the faces from the face. For the nose and hair I pulled out the faces and for the eyes I pushed in the faces.
I decided that I didn't particularly like the face that I created and started the head again with another cube polygon. I moulded the shape of the head before combining and target welding it to the main body. Giving the face a bigger smile and angled eyes gave the clown a fierce yet creepy look. Furthermore, stretching the smile gave the mouth a defined, sharp look which looked really effective. The parts of clothing that you can see in the screenshot were created using the extrude tool whilst having a number of specific faces selected. For the hand, I again, extruded faces from a cube polygon and used the rotate tool to curve the extruded pieces to create curved fingers. The floating party hat above the head is made from a cone polygon which I just made smaller.
This screenshot displays the end product of what my model has turned out to be. After pressing the number 6 (which shows the shaded view with texture maps) I was able to see the result of my texture mapping. I used the planar UV mapping to create a UV snapshot for me to use in Photoshop. I then used Photoshop to design the colours and patterns of what the clown is going to wear/look like and for the party hat I decided to get rid of the cone polygon and extrude two faces on top of it's head to create it. I then used the smooth tool to get rid of the blocky nature of the shapes to create the refined, human shape. When it came to the process of the using Photoshop to create the texture for the model, I created only one UV map and then created quite a few Lambert materials separately by selecting the faces of specific areas of the model. For example, I selected the legs and parts of the top to create the texture for the dungarees. A few of the colours on the face of the clown were not done by UV mapping and creating a texture in Photoshop, it was done by selecting a few of the faces, assigning a new material and then changing the colour in Maya. This was easier for me to colour the face instead of flicking back and forth from Photoshop to Maya to find the faces which I want in a specific colour.
Evaluation:
Half way through the making process of this model, I changed the design of the head as I was not overly pleased with the outcome of it every time I smoothed out the edges. The look was not scary and that was not what I was aiming for. The neck is a little too long for a human neck so if I did remake it I would remake the neck so it wasn't so tall. Furthermore, I made the model bold as I could not agree on a great clown hairstyle that looked okay for the model, however, leaving it bold was a good option and meant that I could add a party hat with ease. On the whole, I think that the model is fabulous in it's pink shirt and blue trousers.
Feedback:
Josh Howitt: Smashed it! I really like it. It fits with the art style.
Kori: What would make it more creepy is either a moustache or glasses.


